![]() |
| I'm a farmer now. My Great Grandfather would be so proud. And probably rolling his eyes. |
Saturday, July 10, 2021
I'm a farmer now
Sunday, June 6, 2021
'Shroomin
I'm not a fan of mushrooms. I won't eat them raw, and I'm only okay with them chopped up into small pieces that I can't easily pick out of my food and it's gotta be in something that I can forget they're in (like stir-fry or pasta sauce).
So you'll find it pretty interesting that I bought myself a mushroom growing kit for Christmas. ::shrugs:: I sometimes do the Bart Simpson method of gardening - Bart: "More Lima Beans please. More. More."
Lisa: "maybe you should eat the Lima beans already on your plate."
Bart: "Who said anything about eating them? I just wanted to look at them."
I also bought kits for Roberta, my friend Jameson, and my mother for Christmas (i.e. I got one of each variety that NorthSpore had available in their Spray n Grow kits). Roberta had one big harvest, and then misting the growing block for a second harvest fell by the wayside when the big freeze hit (since she was without power for DAYS). My mom had one harvest and then was like "this block looks icky, I don't think I want to grow any more" though she did gamely cut out a different side and try to get that side to grow, and instead ended up with another small harvest from the side she thought looked bad. Jameson took a while getting his started because he was worried about the mushrooms sporing and spreading all over his apartment, and when he finally did start growing them and they were looking like they were about to harvest, the big freeze hit and he got more concerned about other things (like making sure his parents still had electricity and water), and by the time he got back to worrying about the mushrooms they were past their prime - he also didn't know at what point he was supposed to pick them, or what he was supposed to do with them (he got the Lion's Mane because I figured if anyone was going to be willing to experiment with a mushroom that's the vegan replacement for fish, it'd be him, but alas, nothing came of it).
My box produced 2 harvests that were pretty dang big (while my mom had to mix in some store bought mushrooms for her harvests, but Roberta and I did not); and the craziest thing about these boxes is just how much it's like "dang, did you see the mushrooms now?!" because they grow very quickly once they actually sprout. I even tried to do a timelapse, but I think I tried to do it when the shrooms were already too big and I should have started when they were little pin-mushrooms instead. So instead you get to see photos taken of the mushrooms like 24 hours apart.
![]() |
| Day 1 of noticing little shrooms (probably like 3-4 weeks after I started misting it) |
![]() |
| Day 2 |
![]() |
| Day 3 |
![]() |
| Day 4 - We harvested a day or so after this I think because Shawn misunderstood what the directions meant by "harvest before the mushrooms have flattened out" |
What we learned from our first harvest: Yes, the oyster 'shrooms really do taste bad when raw. Oyster mushrooms have a very metallic taste to them when raw so they're always cooked - and they tend to be cooked for quite a while (like 20-30 minutes). We also learned that the stems need to be cooked for much longer than the caps if you're using them. After the second harvest, we realized that there is a sweet spot for size of these things because too young and they're tougher and chewy, but if you let them go a little longer they're much better, but if you let them go too long, they get too waterlogged (though that might be more because for harvests 3 and on, the mushrooms have been outside and are subject to the elements).
After the second harvest, NorthSpore recommends breaking the brick apart and mixing in the medium with either straw or mulch and keeping it moist in a shady spot in your yard to get even more harvests. so that's what I did with my mom's block and our block.
![]() |
| Harvest 1 of the outdoor Golden Oyster Mushrooms (they are now, as of 6/6/2021, producing more mushrooms again). |
![]() |
| Harvest 1 of the outdoor Blue Oyster Mushrooms |
![]() |
| Harvest 2 of the outdoor Blue Oyster Mushrooms - these are the ones that are old and waterlogged (and this is about a month after the one above) |
I do, truly, believe that the only reason these mushrooms are producing as much as they are outside is solely because we've been getting SO MUCH small amounts of rain in Austin this spring - like to the point where I'm thinking of making another weather chart for the year - the average amount of rainfall by June 1 is 13.56" and we're currently at 19.66" (6.5" of that falling in Memorial Day Weekend, but otherwise, there's a lot of 0.1" here, 0.02" there). Because, let's face it, f these things needed ME to water them to keep producing, they'd get blasted with water maybe 2x a week if they're lucky.
Sunday, January 6, 2019
Camera Things (Part 1)
Anyway, today's blog entry is brought to you by Roberta's Camera, El Presidente.
El Presidente got sick about a month ago so he was sent off for treatment. Now he's back, but there's a new stud in town (Pincay) so he's been relegated to second fiddle. Because I always talk about how I need a better camera than my trusty ol' Rebel XTi, Roberta offered to loan me El Presidente with one of her lenses so I could play around and determine if I really wanted a new camera.
I haven't done a "camera" test yet, but I did do a "lens" test the other night. I used El Presidente with different lenses to see what type of difference a lens makes. The lens I borrowed is a 70-300 IS lens. The IS stands for "Image stabilization." That means that it tries to account for you moving ever so slightly while taking a photo so that you get a clear photo instead of a blurry one. I have a 70-300 lens, and Shawn has a 70-300 lens so I put them all to the test.
All three lenses have autofocus on them, though Shawn's is a pain in the ass and you really have to use manual to get it close, then switch it to auto so it actually will focus. In any case, while I took a bunch of photos, the ones on the tripod looked about the same, and the ones where IS was turned off on Roberta's also looked about the same, so instead I'm only showing the three photos that demonstrate why you either a) want to use a tripod when taking photos at full extension (i.e. at 300 or b) why you want an IS lens.
As mentioned above, because Shawn's lens doesn't really autofocus, I decided I'd use Manual focus for these photos. Aperature (how much light is let in) was set to 5.6 for all the photos (meaning that the background should be kinda fuzzy). The shutter speed was set to automatic, but ended up being at 1/20 of a second for all three photos. Usually, to cut down on motion blur (i.e. the camera moved), you want your speed to be 1/your distance - that is, I had these all set to 300, therefore I should have set my shutter speed to be 1/300 to cut down on motion blur. Unfortunately, because it was dusk, I didn't really have the luxury of setting my shutter speed faster (unless I changed the ISO - i.e. film "speed" - it's why they always used to tell you "use 400 speed film when photographing sports, 100 if you're doing portraits")
![]() |
| The lens line up: My lens (on camera), Roberta's lens, Shawn's lens |
First up: My lens at full extension (300) attempting to take a photo of our formerly feral cat, Stripsie. As you can see - terribly out of focus. This is worse than normal - Shawn's lens is closer to what I expect, but you also will end up with a LOT of photos looking like this. In this case, I probably didn't properly brace myself (bend the knees, engage your core, breathe in, breathe out, and as you breathe out, press the trigger - it's like shooting a gun, really)
| 300mm, 5.6, 1/20, ISO 320, lens= Canon 70-300 EF 4-5.6 III ($200) |
As you can see, it looks a little washed out, but that's something that's easy enough to fix in GIMP (free photoshop)
a little better but still really bad. The one thing to remember about photo editing - you can fix a lot of errors, but it's damn near impossible to fix 'blurry' so you really want to start with a crisp photo.
Shawn's lens
| 300mm, 5.6, 1/20, ISO 320, lens = Sigma 70-3004-5.6 APO Macro Super ($200) |
And with the level fixing: (btw, this is what happens when you click that little sun at the top of the screen on Instagram if you go into "edit" mode - and aren't using one of their pre-set filters - I believe they call it "lux")
Finally, we have the Image Stabilization lens.
| 300mm, 5.6, 1/20, ISO 320, lens = Canon EF 70-300 4-5.6 IS USM ($650) |
As you can see immediately, the image is much clearer. It's not actually 100% clear - there's still a little motion blur, but it's so much less than the other photos that it appears clear. I also technically had this set to the wrong type of motion correction - I had it set to II, when I maybe should have had it set to I as II is to be used for when you're panning, vs when you're not panning to the side.
And with levels fixing:
So yeah if you plan to be using a telephoto lens, it really does make sense to pay the extra cash for an image stabilization lens unless you're going to use a tripod/monopod for everything. As I said, the photo above is STILL blurry from motion blur, and the only way to fix that would have been to have either a faster shutter speed or use a tripod.
Next up: the different camera bodies:
- Canon D30 (Shawn's. It may not even work any more - it's been probably about 10 years since it's been used if not longer)
- Canon Rebel XTi (Katina's)
- Canon 6D (El Presidente)
** Also, sometime in the last 20 years, Canon changed their lens mount so I may not be able to do my camera test like I want to anyway.
Tuesday, April 19, 2016
Starting My Own Seeds
First, I had to go buy myself some little seed starter setups - I could have probably used 4" pots, but I could get more variety by using the little Jiffy Pellets. Be sure to somehow label your seeds you start so you don't go all forgetting what you planted.
![]() |
| See packets from Grow Journey, Jiffy Pellets, a Sharpie for writing, and Masking Tape for Labelling. |
After getting my little seeds planted, I finally went and got myself the stuff to start my plant grow light. I bought the stuff and came home to plug it all in before realizing that the lamp I bought was meant to be hardwired, not a plug in version. So after doing some research (and some fast and furious texting to a coworker whose dad is an electrician), I managed to figure out what to do to convert it into a plug-in light. As I was banging away in the bedroom (trying to break out a round piece for the plug I used - an old computer monitor cord), Shawn came in and was like "oh dear lord you're going to electrocute yourself." So he took over and finished the wiring.
Then came the fun part of trying to figure out the best way to hang the light from my shelf; the answer: Paper Clips - I had the wires, I just needed a way to raise and lower the light. I actually figured out that using books under the plants was better because it allowed for each plant grouping to be moved closer or further from the light.
![]() |
| Tomato seedlings starting to grow. |
After the ceremonial plugging in of the light, Shawn looked at me and (quite dejectedly) said, "well, great, we've just joined the legions of pot growers out there and are now paying money to grow plants when there's this thing called a sun."
After a few weeks, the seedlings were big enough, and it was warm enough that I moved them outside. So, in the end, I only used the light for a few weeks. But of course, I had to move them in during inclement weather.
![]() |
| Tomato seedlings, Spruce Campbell (my spruce tree seedling), and my home made ginger & cranberry infused vodka in lemonade. |
After a few more weeks out in the sunshine, I transplanted the seedlings into 4" pots, and then a week or so later (3/26), planted them in the garden. Naturally, growing 24 plants is WAY more than I have space for in my garden (especially when I also went to the Sunshine Community Garden Sale with Roberta and got 3 tomatoes and 2 peppers), so I took a lot of the seedlings to work - I got rid of 4 of them before even getting to my floor; and while I thought that I would end up with some extras at the end of the day, they all found good homes.
Now to just get some eggplants, peppers and tomatoes this year...
Sunday, April 3, 2016
Ginger Harvest!
As per usual, I harvested my ginger in late March and ended up with more than I normally use (yeah, I usually use about the equivalent of 1 finger's length in an entire year). I gave away a lot of it, and planted a portion for next year. I plan to try Alton Brown's homemade Ginger Ale, and, if I have enough, AB's candied ginger.
I've found that ginger is one of the easy plants to grow in Austin (in a pot, of course) - it rivals garlic for ease of growing and actually takes just as long (longer actually since ginger takes almost a full year, while garlic takes about 6-7 months). I usually just have to remember to water it - and it's usually on my list of plants to recommend for people who don't garden, especially people who have bright filtered light, but no direct sunlight.
I've blogged about ginger before, here and here, but have been growing it each year since 2011. I started with a piece about the length and size of my index finger split into 3 pieces; and I haven't purchased ginger since - everything I grow comes from ginger grown from that original piece. Now then, of course, if you use a lot of ginger, you'll probably want to grow more than just the one large pot that I usually do.
Wednesday, November 11, 2015
Fall Planting & Homemade Ollas
I made mine thusly:
Step 1: purchase an unglazed terracotta pot with a saucer that fits the top. Also get yourself some permanent craft glue. The directions I followed actually recommended using permanent craft glue and then sealing around the seams with caulk. I opted to skip the caulking part and only used the E6000; so again, I don't know if it will work or for how long, but yay! EXPERIMENT!
Step 2: Follow craft glue directions to glue the saucer to the pot. In the case of E6000, you're to put a thin layer on each piece, let them sit for 2-5 minutes and then press together.
Step 3: After pressing the pieces together, I added a bead around the outside and then let them sit for a few days.
Then came this last weekend - I pulled out the spring veggies (it was tough - especially since both the tomato and habanero were alive; but neither had any flowers and it's really too late in the season to have expected them to produce anything before the freezes), and buried the ollas in the garden - one in each bed, and then planted the fall veggies around.
I left the herbs in place and I had already planted the Inchellium garlic so I really only needed to transplant the starts I had purchased at Red Barn a few weeks ago. This year I'm growing the aforementioned Inchelium Garlic, Garlic Chives, Oregano, "Bouquet" Dill, "Bronze" Fennel, "Snow Crown" Cauliflower, "Pacman" Broccoli, "Black Magic" Kale, "Dragon Tongue" Mustard, "Graffiti" Cauliflower, "Romanesco" Broccoli, and "Southern Comet" Broccoli.
Sunday, August 9, 2015
Taking cuttings of Tomatoes
But I like tomatoes (despite not eating them raw unless they're in salsa), and so I always want them in the garden, but I don't necessarily like nursing them along. But I'm also cheap so I won't buy any new plants, nor will I start seed. So what is one to do? Take cuttings of course!
Tomato plants are actually vines and they will root along the vine where it touches ground. You could just let your tomato plants flop all over the place (which is apparently what my grandma used to do), or you can stake them to take up less space (which is what most people do - I guess that's the difference between living on a farm and not). Occasionally, especially during wetter weather, you'll see bumps along the stem - these bumps are not some weird Tomato STD, but are actually little aborted root nodules - when you see these, your tomato is trying to root.
If you want any other proof that tomatoes are vines that root easily, my friend accidentally decapitated a tomato plant as she was planting it in the garden - she, being an engineer and up for a grand science experiment, planted both the bottom half (with roots and a few leaves) and the top half (the growing tip) in the garden next to each other to see what would happen. The top part ended up being the best tomato she had in her garden that year.
So! Tomato Propagation. If your tomato plant needs a do-over, you can take some cuttings and plant those (it's also a good way to save tomatoes over the winter if you've got a greenhouse).
Step 1: Find your victim (I mean donor!).
Step 2: Cut off about 4-6" of a growing tip of the vine - you can't just cut off a leaf and expect it to work, you need some actual stem and a growing tip.
Step 3: Cut the stem at an angle and remove the bottom leaves leaving only the top two leaves.
Step 4: Hold your pruners at an angle and drag it along the bottom inch or two of the stem. Supposedly this 'bruising' helps with rooting.
Step 5: This is the point where you would dip the cut end in rooting hormone if you have it/want it; but I've also known tomatoes to take root without the hormone - but the rooting hormone does help.
Step 6: Poke a hole in the dirt (whether that's in the garden, or in a 4" pot). If you're using a pot, I'd recommend using cutting/seed starting mix as opposed to regular garden soil.
Step 7: Put your cutting in the hole and press the soil around the stem.
Step 8: Water well.
Step 9: Label your plant.
Step 10: Water daily - it would also be smart to provide shade so the poor little thing isn't having to contend with trying to grow roots and fend off the death star.
Step 11: Wait a few weeks (I noticed mine had roots after about 2 weeks; but I also use the rooting hormone)
Step 12: Plant!
Now then, by the time I'm getting around to writing this (August), it's already too late to really be planting tomatoes - the last weekend in July is generally the last recommended date for planting tomato transplants, BUT, now you'll know for next year.
Friday, July 10, 2015
Infusions
But why stop at vinegar? Why stop at herbs?
But first, let's talk about the set up for infusions. What you'll need:
- large glass jar with lid (preferably plastic, but you can use a mason jar, you'll just have to protect the metal with a sheet of plastic wrap if you're using vinegar)
- a plastic lid from a yogurt container cut to slightly smaller than the inside diameter of the jar, with some slits cut in it.
- vinegar, oil, vodka, bourbon, or tequila - enough to cover your herbs and then some.
- your herbs, fruit, vegetables, garlic, peppers, etc. (when using fruit/vegetables, use the ripe ones - it should smell like what you want - if using citrus fruit, you only need the peel, pith removed.)
And now for the photos:
![]() |
| Put your infusers in the jar (in this case, a peeled head of garlic and 4 Thai peppers) |
![]() |
| prepare your "hold everything below the surface" yogurt lid |
![]() |
| Select your poison (in this case vinegar) |
![]() |
| A top view of the infusers (garlic and dried thai peppers) |
![]() |
| place the yogurt lid on top of the infusers |
![]() |
| Add the liquid. Let sit for a few weeks before using. I tend to just let the items sit in the jar until I finally decide that I want to start a new infusion. |
I tend to use vinegar infusions as a finisher for sautéed summer squash, roasted Brussels sprouts, and making homemade salad dressing (which consists of herbed vinegar and olive oil). The one above also gets used on breakfast potatoes when they need a little extra kick.
When using other liquids, choose good quality ones - in the case of liquors, choose ones that you would actually drink - so don't cheap out on the vodka and get the one that burns like paint thinner just to save a few bucks.
I've just recently expanded into trying basil in olive oil:
Lemon peel in Deep Eddy vodka (taken a few days after I started):
And peaches in Deep Eddy vodka (taken a few days after I started):
In the case of vodka infusions, I've had coworkers who have done fennel, corn (surprisingly good), cucumber, raspberry, strawberry, and blackberry. In all cases, it works best if, after a few days, you taste test the infusion to see if it's got the flavor you were aiming for. In any case, you probably don't want to leave the items in the vodka indefinitely. Besides, how are you supposed to eat those delicious vodka-soaked fruit on ice cream if you leave them IN the vodka?
Monday, June 16, 2014
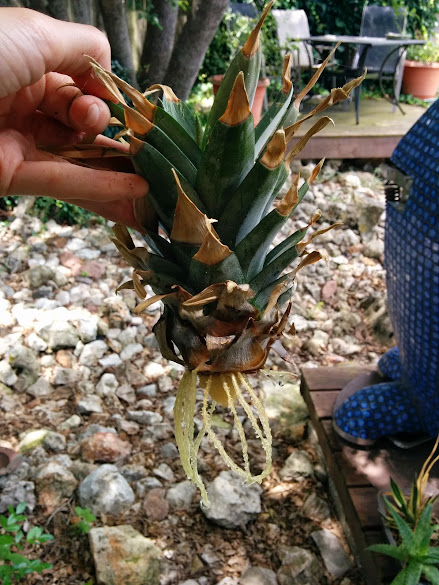
Sprouting Pineapple
Ginger and Garlic can be grown really easily, though you'll have to give up some of your edible part to get them going (whereas with the linked plants, you're growing the part that you throw away, or it's a part that isn't that big of a deal if you don't eat.
Tuesday, September 24, 2013
Around the Yard - Early Sept 2013 - Edibles Edition
| Looking toward the photinia |
| Looking away from the photinia |
A few years ago, I made the mistake of adding lemon balm to the garden. It was intentional - it was one of my science experiments. The experiment was to see if it repelled the squash vine borer. I didn't notice any difference, as in, all my squash was still destroyed. We did, however, discover that lemon balm works relatively well as a mosquito repellent. Temporarily, at least. And I'd rather smell like lemon than sweat. And so, the lemon balm was given reprieve after reprieve. Then I added Garlic Chives, and two Chile Pequin, and Swiss Chard, and Thyme, and Oregano. And now I have have very little space in my gardens for important plants like tomatoes, peppers and eggplants. Ironically, I just recently pulled out all the lemon balm because I don't really use it for anything and it doesn't seem like any of the beneficials like it either.
Maybe I should move the herbs to a different location (perhaps to the area by the possumhaws). I should really clear out the area where I actually PLAN to plant chile pequins and move them this fall.
| Potato Box plants...none of which are potatoes. Naturally. Also, I don't remember why there's a pipe-cleaner twisted around the one post. I'm sure I had a good reason at the time. |
Anyhoo, back to the potato box plants that aren't potatoes. In case you haven't already noticed, the husband and I are, generally speaking, lazy. Why put away your garden stuff when it's past the season which you're using it for when you can just leave it out there creating an eye-sore in your yard? We tell ourselves that we've left it there to help the Arizona Ash stump decompose quicker. In reality it's just that we're lazy and we keep saying that we'll try potatoes again. In the mean time, I use it as a regular planting bed. Right now it's got a Habanero, Eggplants, an Orange Fogo Pepper, and a Cossack Pineapple ground cherry. Let me tell you about the ground cherry. I got the seeds from The Great Outdoors when I went to get a Christmas gift for my mother in law. They were on clearance, and they were right by the register. I thought they were some type of tomato-like plant. And I guess they technically are since they're in the same family. The fruit looks like little tomatillos, and they are sweet and tart. I like them. The husband isn't as much of a fan, but he'll eat them. The plant we have has been doing pretty well and making a bunch of fruit. They're like peas, though - you have to have a bunch of plants to get enough to do something with otherwise, they're just an item that you stand out in the garden eating the ripe ones when you see them.
The eggplants just recently started flowering, so I don't know if we'll get anything from them this year. The habanero and the orange fogo will be dug up in about a month and I'll try to keep them alive through the winter so I can use them next spring.
Sunday, December 30, 2012
Season Roundup Spring 2012
Oriental Eggplant: Free from Renee Studebaker.
Notes: Only 2 eggplants, 1 was eaten by bugs before I got to it.
Experience: Meh. Nothing has come close to that Cloud 9 eggplant from a few years ago.
Unknown Tomato: Free from the East Austin Garden Faire
Notes: I think it may be a black krim - the tomatoes look and taste similar. I grew it in the grow box I made. I was most surprised that even though the tomatoes had constant access to water, they still split. a lot. I don't remember how many tomatoes we got - more than the normal 5 I get from the conventional way of growing a black krim.
Experience: pretty good - too bad I'm not positive on what type of tomato it is...I would normally save seed, but I'm not happy with how easily the type splits.
Black Pearl Pepper: Free from Renee Studebaker
Notes: Took a while to really take off. Now the plant is about 3' tall. I haven't eaten any of the peppers yet.
Experience: Pretty good. I'd definitely think about planting this plant again - though I gotta admit that I'm more taken with the black jalapenos.
Renee's Black Jalapeno (green): Free from a black jalapeno plant that Renee had - it was apparently a reverted Black Pearl Pepper.
Notes: I planted 4 seeds, and all four came up. Two of the plants ended up being a "green" plant (that is, they had all green leaves), while the other two were "purple" (having leaves that look like they've been dipped in purple). The flowers on the plants are a white with a purple tinge. Of the green plants, one went crazy producing black jalapenos, while the other really didn't.
Experience: Awesome. I've already saved some seed, hopefully it will come back true to form.
Renee's Black Jalapeno (purple): Free from a black jalapeno plant that Renee had - it was apparently a reverted Black Pearl pepper.
Notes: I planted 4 seeds, and all four came up. Two of the plants ended up being "green", while the other two were "purple." Of the plants, both of the purple ones grew quickly but didn't flower until late summer. The flowers on this plant, by contrast are purple. One of them is finally starting to produce peppers.
Experience: Awesome. I will be saving seed and hopefully it will come back true to form. [UPDATE: I saved peppers from the plant, but I don't really remember which ones came from which plant...dammit, I knew I should have labeled them as soon as I pulled them off the plant...I'm pretty sure the red peppers came from the purple plant, but I'm not positive.]
Garlic Chives: Free from Bonnie.
Notes: I only planted this in the garden because I didn't know where else to put it, plus the cats tend not to eat plants in the garden, but they'll munch on plants elsewhere in the yard. The plant really just looks like a giant clump of grass (not unlike liriope) until it blooms when it gets awesome white pom-poms.
Experience this year: Not bad...not great - I never used them really (not surprising), and they're taking up precious space in the garden. It's actually the Garlic Chives in combination with the Lemon Balm that have convinced me I need to make an herb specific bed. Also, it looks like they'll need to be divided in the spring...so who wants some garlic chives?
Lemon Balm:
Notes: I originally got these two plants as part of an experiment to see if they repelled the squash vine borer (I didn't notice a difference). I now use them for mosquito repellent when I'm outside and the mosquitoes are bugging me (ha! bugging!). My in laws like to use the plant in salads. We don't do that since Shawn isn't a fan of lemon flavored anything.
Experience this year: I may have to pull out the plants - they're looking really spent...The salt marsh caterpillars did a number on them this fall - so now they're much more like a mat-type ground cover instead of a bushy herb.
Habanero:
Notes: A hold over from last year - Yes, I managed to keep it through the winter (not a difficult thing though with the last winter we had). Of course, it was pretty hilarious when I realized that the plant was the habanero - for some reason I thought it was the Thai pepper plant (we're still working our way through the 149 peppers from that plant, by the way). Put the plant in the compost bin on 11/4.
Experience this year: Not bad - I don't remember how many we've gotten from the plant...5 maybe? I've saved seed, so maybe I'll get more next year.
Naga Jolokia:
Notes: A hold over from last year - yes I managed to keep it through the winter. I have cut it back to try to keep it through the winter again.
Experience this year: Managed to get 3 peppers from the plant. I've saved seed, so I may try growing from seed if the plant looks iffy during the winter.
Thai Basil:
Notes: I don't remember spreading seed this year...
Experience this year: Remember how I mentioned before that this stuff reseeds aggressively? Yeah...since the drought killed off the grass, the basil started growing in the yard... Nice when Shawn mowed because it smelled like basil. in mid-October, Shawn insisted the plants needed to be removed so I pulled them all out and turned them into basil cubes. I've gotten to the point where I think normal basil tastes funny though...so that's probably not good.
Sweet Basil: $1 at East Side Succulents
Notes: I got this because it was on sale.
Experience this year: I used it a few times, but most importantly, when I pulled out the plant on November 4th, I used the leaves to get some herb infused vinegar going. Also...I really need to get back into using regular basil instead of Thai basil.
Aurora Pepper: $1 at East Side Succulents
Notes: I got this because it was on sale and the pepper goes through 4 different colors before being fully ripe.
Experience: Tis but a tiny plant. I've dug it up to try to keep it through the winter.
Aji Pepper: $1 at East Side Succulents
Notes: I got this hoping it was close to the yellow hot pepper from a few years ago. Unfortunately, it ripens to a red color. It is supposed to be spicy.
Experience: The poor plant was covered for most of the summer by the gomphrena, but it's still keeping on keeping on. I pulled 2 peppers off of it on 11/4. I've dug it up to try to keep it through the winter.
Tequila Sunrise Pepper: $1 at East Side Succulents
Notes: I got it because it looked like a carrot on a pepper plant. After planting, I pulled the pepper off and ate it. It is a sweet pepper variety.
Experience: The plant never really grew any. It had a new pepper on it, but a bug got to it on 11/1. I've dug it up to try to keep it through the winter.
So...Uh...yeah...this is quite the list of plants considering I 'didn't have a garden' this year...
Friday, November 9, 2012
A difference in Peppers
The "purple" black jalapeno plant - the leaves are purple mottled, the flowers are purple, and the pepper start black and ripen to red.
I love doing first generation plants - both of these came from seed from one black jalapeno. SO AWESOME!
Sunday, October 7, 2012
Saguaro!
Those giant cacti start out as a tiny little seed - seriously, the seed is the size of a basil seed. I figure they'll work well as container plants until they get too big. I got the seeds from my friend Ross (who keeps claiming that he'll get his garden blog up and running - I mean he's got tons of photos for it, he just hasn't sat down to do it), who brought them back from his trip to Arizona last winter.
Tuesday, October 2, 2012
Experiment: Crocus Sativus "Saffron"
Thursday, September 20, 2012
Plopper vs. Planner
You see, in gardening, you're either a planner or a plopper. Ploppers can become planners, but rarely does a planner become a plopper. A planner PLANS the garden - what plants, where they'll go...some even get really good at it and are able to get plants together that will compliment each other (whether in bloom color or foliage contrast), and add plants that provide 'seasonal interest.' In my completely non-designer speak, I take 'seasonal interest' to mean 'doesn't look like a bare twig in January, or if it is a bare twig, it is going to be the best bare twig you ever did see.'
| My beloved culinary ginger plant (zingiber officinale) and the beloved sugar cat completely ignoring me and waiting for the magical door fairies to come open the door for him. |
A plopper, by contrast, PLOPS in the garden. A plopper gets a plant, figures out what it needs to grow and then plops it in the ground in a fitting location with little regard to what is planted around it, when it will bloom, and how it looks in that location. I am a plopper. I can't pass up a good deal (including free plants gifted to me by other garden bloggers - they're totally thinking "I know, I'll give it to that sucker, Katina!"). Hell, I can't even bear to throw out plants that I don't need nor want - I'll dig them up and give them away to others "HAHA! I'll totally foist these off on those suckers known as fellow garden bloggers and/or coworkers!" The point is most ploppers' yards are a mishmash of mixed plants and, during certain parts of the year, look devoid of all life.
| My avocado tree. I started this thing from a pit in May 2005. See, I can't even throw out things that are POTENTIAL plants. |
Tuesday, August 21, 2012
F1 Black Jalapenos
The other two plants have purple "dipped" leaves, but are not producing peppers at all - though the bigger of the two plants does look like it's getting ready to bloom. So, we'll see. I just love experiments, don't you?!


