Showing posts with label what have I gotten myself into?. Show all posts

Sunday, September 26, 2021

A Long Suffering Project

 A few weeks ago, Shawn brought up "the hideous bed." Again. I call it "the hideous bed," not because it's hideous, or even a bed, but because Diana's husband called one of her flower beds right after she finished it "hideous" and never changed his mind, and thus "hideous bed" is now a catch-all for anything in the yard that the non-gardener/landscaper hates. Even if it is a half-finished project.


This is a "half finished project" because I originally was going to remove the rock, backfill with soil, and landscape. Unfortunately, as soon as I removed some of the rock (to use for 2 other yard projects), I realized that the area was actually graded in a way to direct runoff away from the house, so backfilling with soil was immediately out, but I was also too lazy to go get more rock, and I also wasn't sure if I wanted to try to do some sort of french drain system.  

So, while he was off on his boy's trip (mountain biking in Colorado), I decided to finally DO something about the half finished hideous bed.

Instead of getting more limestone piece like we've already got, I decided to change it up with some "shadow stone" instead. I went with angular rock just so it compacts together and provides a more stable walking medium.  Now it's officially "done" but I'm still debating on putting something in the center area - like the birdbath or the bird statue. 

Of course, now I'm also all about redoing the area between this spot and the house - removing all the plants (liriope and rough leaf dogwood) and starting over - maybe with a Rusty Blackhaw and Inland Sea Oats or Columbine


Sunday, June 6, 2021

'Shroomin

I'm not a fan of mushrooms. I won't eat them raw, and I'm only okay with them chopped up into small pieces that I can't easily pick out of my food and it's gotta be in something that I can forget they're in (like stir-fry or pasta sauce).  

So you'll find it pretty interesting that I bought myself a mushroom growing kit for Christmas.  ::shrugs:: I sometimes do the Bart Simpson method of gardening - Bart: "More Lima Beans please.  More.  More."

Lisa: "maybe you should eat the Lima beans already on your plate."

Bart:  "Who said anything about eating them? I just wanted to look at them."

I also bought kits for Roberta, my friend Jameson, and my mother for Christmas  (i.e. I got one of each variety that NorthSpore had available in their Spray n Grow kits).  Roberta had one big harvest, and then misting the growing block for a second harvest fell by the wayside when the big freeze hit (since she was without power for DAYS).  My mom had one harvest and then was like "this block looks icky, I don't think I want to grow any more" though she did gamely cut out a different side and try to get that side to grow, and instead ended up with another small harvest from the side she thought looked bad.  Jameson took a while getting his started because he was worried about the mushrooms sporing and spreading all over his apartment, and when he finally did start growing them and they were looking like they were about to harvest, the big freeze hit and he got more concerned about other things (like making sure his parents still had electricity and water), and by the time he got back to worrying about the mushrooms they were past their prime - he also didn't know at what point he was supposed to pick them, or what he was supposed to do with them (he got the Lion's Mane because I figured if anyone was going to be willing to experiment with a mushroom that's the vegan replacement for fish, it'd be him, but alas, nothing came of it).  

My box produced 2 harvests that were pretty dang big (while my mom had to mix in some store bought mushrooms for her harvests, but Roberta and I did not); and the craziest thing about these boxes is just how much it's like "dang, did you see the mushrooms now?!" because they grow very quickly once they actually sprout. I even tried to do a timelapse, but I think I tried to do it when the shrooms were already too big and I should have started when they were little pin-mushrooms instead.  So instead you get to see photos taken of the mushrooms like 24 hours apart.

Day 1 of noticing little shrooms (probably like 3-4 weeks after I started misting it)

Day 2

Day 3

Day 4 - We harvested a day or so after this I think because Shawn misunderstood what the directions meant by "harvest before the mushrooms have flattened out"

What we learned from our first harvest:  Yes, the oyster 'shrooms really do taste bad when raw.  Oyster mushrooms have a very metallic taste to them when raw so they're always cooked - and they tend to be cooked for quite a while (like 20-30 minutes).  We also learned that the stems need to be cooked for much longer than the caps if you're using them.  After the second harvest, we realized that there is a sweet spot for size of these things because too young and they're tougher and chewy, but if you let them go a little longer they're much better, but if you let them go too long, they get too waterlogged (though that might be more because for harvests 3 and on, the mushrooms have been outside and are subject to the elements).

After the second harvest, NorthSpore recommends breaking the brick apart and mixing in the medium with either straw or mulch and keeping it moist in a shady spot in your yard to get even more harvests.  so that's what I did with my mom's block and our block.

Harvest 1 of the outdoor Golden Oyster Mushrooms (they are now, as of 6/6/2021, producing more mushrooms again).

Harvest 1 of the outdoor Blue Oyster Mushrooms

Harvest 2 of the outdoor Blue Oyster Mushrooms - these are the ones that are old and waterlogged (and this is about a month after the one above)

I do, truly, believe that the only reason these mushrooms are producing as much as they are outside is solely because we've been getting SO MUCH small amounts of rain in Austin this spring - like to the point where I'm thinking of making another weather chart for the year - the average amount of rainfall by June 1 is 13.56" and we're currently at 19.66" (6.5" of that falling in Memorial Day Weekend, but otherwise, there's a lot of 0.1" here, 0.02" there).  Because, let's face it, f these things needed ME to water them to keep producing, they'd get blasted with water maybe 2x a week if they're lucky.


Sunday, December 6, 2015

Your Mid-Fall update

It's like the middle of fall.  I've got some shrimp plant blooming; and the Mexican Petunia (or Carolina Petunia, depending on who you ask) is putting out blooms like no tomorrow.  The milkweeds are all still blooming and the grasses have their fall seed heads.  Yet, it seems like everything is getting ready for winter.  I've pulled in the ginger and the tender succulents/cacti.  I have my Vorlon tomato wrapped in Christmas lights (as well as one milkweed plant that I keep moving all the caterpillars I find to); but I keep forgetting to bring in my pepper plant (it's totally going to die).  The tomato plant has a few huge tomatoes on it, but they don't look like they're getting ready to turn and I know what's going to happen is that it's going to get down to freezing on one of the nights that we're not home and that's how I'm going to lose my tomato...which is fine as long as I actually get the tomatoes off of it first.

Now's the time to do projects, and I've got a big one lined up; but it's also going to require getting some PVC pipe and drilling holes in it (easy), and then laying them down and filling an area with angular rock (much harder if only because it requires my husband to help), and then mashing them with a weight thingy until my arms fall off (extremely hard).  Needless to say I'm putting it off because I'm nothing if not a procrastinator.

Wednesday, August 19, 2015

Bed Spread

Do you ever have problems with the spreading of a garden bed?  Does it have more to do with you adding more plants to the bed (like in my grass bed), or does it have more to do with the plants themselves propagating and spreading (like my fence bed)?

A lot of the plants in my yard may be considered invasive (like that Asiatic Jasmine and Boston Ivy that the previous owner planted), and some I've planted (like the giant petunia which some call Mexican Petunia, but others have said that it's not, and according to the Botanical Garden of Key West, it's Carolina Petunia), and still others probably should be considered invasive, but because it has a benefit it's generally okay (like passionvine).

I've known for a while that the Asiatic Jasmine and Boston Ivy moved into the neighbor's yard; but I didn't realize that the Petunia and the Passionvine had moved into the other neighbor's yard until I saw it blooming through the fence...so I stuck my phone over the fence and took a photo:


Uh Oh.  But also considering they have the hose out there I think they're actively trying to encourage the petunia/passionvine combo.

Tuesday, March 31, 2015

Cacti/Succulents

Time to clean up ye olde cacti/succulent pots. I think my gardening goals for the year are going to include researching all the cacti and succulents I have in pots and figuring out which ones need to be brought in for the winter and which ones don't. I realize I totally could just leave them all out and if they make it, they make it, and if they don't, they don't, but I should at least probably AIM to do some research to know what I have in which pots. And don't you worry - I have SO MANY MORE POTS than what's shown here.

I think I'm beginning to have a Pot problem...

I did go to college at the University of Colorado, afterall.

One of my hooter pots

XTERRA cactus in the small blue pot (picked up during my husband's first ever XTERRA triathlon)

Table vignette after everything was cleaned up and trimmed back.

Sunday, February 22, 2015

Every Garden needs a cat...or 3.

Jiffy and Blackjack having breakfast together
Jiffy has found a new friend. 

Blackjack high tails it over the fence whenever I go outside to put food out, but he's caught on to when the food is going to go out, so he sits on the fence about 20' away from our property until I've gone back inside then comes over to get food.  I'm happy that he's getting used to the schedule because it means it will be easier to trap him to get him fixed. (Jiffy is already fixed per the notch in his ear)  Also, I can't say no to Blackjack - he's the spitting image of Quazi who disappeared a year ago.  I'm taking it as some type of sign and have essentially adopted him as a secondary feral.

Jiffy is what I'd call "semi feral" - he doesn't let me near him, but he also won't run that far away from me.  I think it's funny that he gets so caught up in making sure he's RIGHT THERE when I put the food out that he's prone to running into the legs on the table.  Shawn thinks it's funny that the cat insists on keeping a 6' distance from me - as if feeding him twice a day for a year is just my means to lure him into a false sense of security so that we can catch him and eat him.  I also think I could probably get him to be less feral by feeding him wet food via spoon (it's the easiest way to domesticate kittens), but I don't have the time for it - especially when I know he's always going to be somewhat feral and would never appreciate being petted.
Jiffy telling me that I'm late with dinner.

Ivy has been putting up quite nicely with the boys.  She will stalk them and follow them until they're out of the yard, but both of them are so scared of her that they haven't even tried to stand their ground. I think it helps that they know she's not going to follow them over the fence.

The only reason why I started feeding feral cats was because we would inevitably end up with food that our owned cats would refuse to eat and I'd rather feed the wildlife instead of throwing it away.  I just figured the wildlife I would end up feeding would have been opossums and raccoons. 

Sadly, I haven't ever had to buy food specifically for the ferals because Quazi would occasionally decide that whatever wet food we had for him wasn't the right flavor. After he disappeared, we had the stash of Quazi food which took about a month to get through and then Ivy decided she didn't like the prescription dry food she was supposed to eat shortly after I opened the bag. Of course I then bought a few different small bags of food in a quest to find something she did like and we're STILL working through them.  I just finished the prescription food earlier in the week, and we're almost done with the Blue Buffalo food; then we'll move on to the Royal Canin food (another food she used to eat and has recently decided is unacceptable - again just after opening the bag).  All this while the only food Ivy will eat right now is Meow Mix. 

That's right, my feral cats eat better than my actual owned cat.

Monday, October 6, 2014

All Hail the Monarchs (round 2)

2nd, 3rd and 4th; or 3rd, 4th, and 5th Monarch Instars

So this last Saturday I went outside to do my normal garden walk about (mostly to check on the veggies to see if they needed water), and I came across a caterpillar on the milkweed.  So I went and grabbed my phone to research whether it was a Monarch caterpillar or a Queen caterpillar.  2 sets of antennae looking things...Monarch!  huzzah!  and then I noticed another one, and another one and so on and so forth and I'm sure at some point I went from ecstatic to forlorn and defeated because the survival rate of monarchs in the wild in caterpillar stage is about 10% (per the presentation from Chuck at the Monarch Appreciation dealie at Zilker in mid-September).  And so I decided I needed to help the caterpillars.  But I didn't really know how - it looked like, based on MonarchWatch's website that I could make a caterpillar container out of Ziploc tupperware and an old screen I use to keep cats from digging in my garden after planting seeds.  I fashioned 5 containers of monarchs, 2 per container, and balanced the screen on top; then I found another later in the day, and two more the following day.  In the end I had 13 caterpillars, mostly all at the same stage, but with 2 at least one instar behind.

My containers are set up thusly:
  1. 1 tupperware-ish container approximately 3" deep.
  2. 1 wetted paper towel lightly squeezed
  3. 1 milkweed leaf per caterpillar in container
  4. 2 caterpillars per container, maximum of 3
  5. Ventilated covers (I just use an old window screen and cover all of the containers at once...this requires that all the containers are the same height in order to work, naturally)

Put the wet paper towel in the bottom - I open it up to cover the entire bottom so it catches all the catpoop.  Lay leaves on top.  Insert caterpillars. Replace the paper towel every day, replace leaves and add more leaves as needed.  The first day or so I got away with adding one leaf per caterpillar per day.  Around Monday morning I noticed that some of the containers were empty of food (I added fresh leaves Sunday night), so then I started adding one leaf per cat in the morning and one in the evening.  By Tuesday I was adding 2 leaves per cat twice a day.  Today (Thursday), I'm up to 3 leaves per cat twice a day.  But of course, most of them are in 5th instar stage so they should be pupating soon.


Pupating.  Crap.  Forgot about pupating.  Pupating in a tiny little not-super-deep container probably isn't the best.  This meant that I needed to come up with some way to allow the caterpillars to pupate and have space for emergence (enough space to allow them to hang upside down to get fluid into their wings and flap their wings about).  So I went to the good ol' Walmart (because I figured by Sunday that there was no way for me to find one of those fancy zippered butterfly cages in time for the pupating stage), and started looking for some of those screen food covers.  I didn't find any.  But I did find a 13" cube pop-up laundry baskets.  I then used some tulle and duct tape to fashion a top to the container, which attaches with clothes pins and safety pins.  Wednesday night I moved three of the tuperwares into it since those caterpillars are in 5th instar which means they should be pupating soon.


Of course, after going through this hassle, I found that I could have put my plethora of old yogurt containers to good use.  Oh well, maybe I'll do that for the next few caterpillars that are reaching the 5th instar stage to see which way works better.

Tuesday, May 13, 2014

As if I didn't already have enough to do

I apparently decided that I had a bunch of extra time on my hands, so I decided to start fostering kittens.


The shelter, as of this morning, had 71 kittens that required foster in their nursery (there are countless kittens already in foster).  We have two of them - Butter and Sugar.  Sugar already has someone who has decided to adopt her, but Butter is still looking for a home.


Kitten season, has finally started so if you want to do something good without the lifetime commitment of adoption, seriously think about kitten fostering.  The shelter has everything from mom cats with kittens, to single kittens who require a week or two of fostering before they can get fixed so they can be adopted.

Thursday, April 10, 2014

Yard Design

So back when my parents moved into their house, they were given the option of either paying for the building company to design and install their yard, or they could do it themselves (or hire someone).  They decided that since going with option A also meant that they had no choice, or even veto power, on any plant that was planted, that they were just going to have me do it.  Of course, that also would have meant that I would have been digging holes and what have you - all on top of my normal yard work that I need to do, and all the shelter work on the weekends, and it was just pretty obvious that it was going to be bad for all parties involved.

But, I did offer to come up with a plan, or review any plan they got from the landscaping company. 

In the end, the plan they're using is one that is a modification of the plan that the landscaping company based on my original plan.

The final plan:


1. Big Muhly
2. Paleleaf Yucca
3. Purple skullcap
4. Beautyberry
5. Cast Iron Plant
6. Green Cloud Texas Sage
7. Blackfoot Daisy
8. Possumhaw Holly
9. Butterfly Iris
10. Bearded Iris
11. Gulf Muhly
12. Autumn Sage
13. Desert Wilow
14. Trailing Rosemary
15. Mexican Mint Marigold
16. Mexican Oregano
17. various Culinary Herbs
18. Gregg's Mistflower
19. Shrubby Boneset
20. Mexican Bush Sage
21. Conflower
22. Texas Ash
23. Red Oak
24. Lavender Crepe Myrtles
25. Esperanza
26. Plumbago

Wednesday, February 5, 2014

On Mold

So I sowed those little lettuce and spinach seeds and I dutifully went out and watered everything every day and the day came and went where I was supposed to see seedlings, and I kept on watering and hoping and what have you.*  And then I gave up and decided to start a little INDOOR bed of lettuces and spinaches. 

I accomplished this feat by reusing one of those large containers that spinach comes in at the store.  I slashed a few holes in the bottom, I put a layer of coarse sand, and then in went the dirt, then some worm castings and finally some seed starter mix.  I watered the dirt and then pressed some seeds into the seed starter mix.  I then covered the bin by putting the lid on it and set it on my kitchen table.

I then promptly forgot about the damn thing.

A few days later I was like "oh yeah, I should probably see if it needs more water."  More water it did not need.  When I pulled the lid off, I was dismayed to see that while I had a bunch of sprouts, I also had a bunch of mold. 

After a quick Google Search, I figured it was probably damping off (or was going to be turning into that very quickly), and the recommended solutions are to set up a fan to allow airflow around the seedlings (I didn't really want to go looking for one of our fans), poking some holes/messing with the dirt to get more air into the soil (yeah, that sounds like a brilliant idea with seedlings that are really just sproutlings), or spraying everything with hydrogen peroxide (huh, well, I guess that could work).

Choosing the easiest option at the time, I went with the hydrogen peroxide.  If you remember high school chemistry, hydrogen peroxide is 2 hydrogens and 2 oxygens.  It breaks down pretty quickly into water and oxygen.  So I sprayed everything with the H2O2, left the lid off and went to bed for the night.

I'll be damned if that didn't clear up everything by the next morning.  The next day I thought I had dreamed the mold since everything looked good and dandy.  I continued to spray everything with the peroxide for the next couple of days, but now I'm just back to spraying with regular water (and obviously leaving the lid off since most of the seeds sprouted).

* Now, of course, the outside seeds have finally decided to sprout - though only in the actual garden bed, I think the ones in by the artichoke gave up because the squirrels kept digging in the soil.

Thursday, January 2, 2014

Wide Shots

So Tim at Xeric Front Yard has been posting wide shots of his yard every month.  He started doing it because Heather at Xericstyle said people should post more wide shots of their yards.

This seems like something I should partake in as well.  I mean, the macro shots are great, but it's very hard to convey the feel of the yard if everything is a macro shot.  Don't get me wrong, I LOVE the macro shot - the macro shot makes it easy to hide all the empty spots.  It makes it easy to hide that invasive nandina in the back, or the fact that the Asiatic jasmine is making a break for it and is about to take over the fence to the neighbor's yard. (Which reminds me, add "cut jasmine to be in bounds" to my ever-growing to-do list.  Actually, add "make a to-do list" to my to-do list.  Does anyone know if any of those gardening social sites have to-do lists as an option on them?)  The macro shot makes it so easy to hide the imperfections of the yard.  My grandma and grandpa said they liked seeing my yard when they came to visit last spring because I never post long shots of the back yard.  I will, however take long shots looking toward the veggie garden, and the point of it is to show the different stages the veggie garden goes through. Which, you know, is kinda the POINT of taking long shots of the entire yard - to provide perspective, to show where the problems are, to show that things are ephemeral.  Also, HI GRANDMA! :::waves wildly:::

This is kinda like Bloom Day and Foliage Followup, right?  The points of those is to show what plants are blooming (so you can figure out if your plants are ahead or behind schedule for your area), and which plants are doing the heavy lifting in your yard when the bloomers are being petulant. 

So yes, I will make an effort to participate more frequently in these type of things - I may not post on the day (because I do work, and I normally get home after dark), but I will at least try to post something at the beginning-ish of the month for the wide angle shots, and something in the middle of the month for bloom day/foliage follow up. On the plus side of doing the wide shots, I'll probably do those photos with my phone as opposed to the macro shots, which just beg for the DSLR.

And of course, since I just decided to participate in this, you're going to have to wait until Saturday when I get a photo of the front yard, and I'll even do panoramic of the back yard (maybe it will even be a little video if I can figure out how to do that).

Saturday, April 27, 2013

Mull-shay

The original plan, back in the day, was to mulch the ever-loving-shit out of everything.  But I am lazy, and life happened, and Shawn said that he wanted to get rid of some of the grass; not all of it.  All this to say that we (meaning I) never did mulch the plants I planted in the fall.

Because Shawn is the one that gets to mow the yard, he had been attempting to mow in between and around the possumhaws (as well as the ornamental grasses, and around the cedar elm tree).  It wasn't going so well - or rather, it was going fine, it was just a pain in the ass.  He said as such and practically begged me to allow him to remove the grass in those areas.  Naturally I agreed.

And so it came to pass that on the 13th we (meaning we) spent the day pulling up grass, spreading compost and leaf litter, laying down newspapers, watering said newspapers, and then spreading 3 bags of mulch in the area around the possumhaws.  We totally planned on doing the other areas too, but as I said, life got in the way. 

The plan for tomorrow is to dig out more grass, lay more newspaper and spread more mulch (assuming we can find a place open where we can get a truckload of it - it makes little to no sense to purchase bags of the stuff when we can, and will, end up using more like a cubic yard of it).

Yay! Mulch!

It should be noted that we spread the mulch on the 13th or so (2 weeks ago).  I spent this morning digging up that damned nut sedge out of this area.  It's annoying stuff, and after you read This Article, you'll understand why (ifin you don't already have experience with it).

Monday, March 18, 2013

Phase 9 of eleventy - billion

Phase 9 - put the rain barrel on cinder blocks and create the planting bed at the base. 

Of course the planting bed became more of a drainage project when we figured out that the rain barrel could only really be set up with the overflow port on the side that faced uphill. 

Of course, I saw this overflow conundrum, and I said "I just need to dig out a little ditch and everything will be hunky dory."  But then I back filled with loose dirt.  This of course didn't work out very well during the rainstorm we had - the dirt got pushed out of way at the bottom of the cement drain guide and then just flowed directly to the cinder blocks.  So I knew it had to be fixed - and of course this is all dumb because while I was backfilling with dirt I thought to myself "oh this isn't going to work out well... I should really back fill with rock."  And lo, the woman, she is brilliant.

So this last weekend, I re-dug out the area by the plants I had planted, and then made a much more defined drainage ditch and backfilled everything with rocks instead of dirt.  You read that right.  Me.  Not the husband and me.  Just me.  This is because he claims that if I had left the grass alone it would have been fine and I was making a mountain out of a molehill, why do I have to go redoing the perfectly adequate yard, yada, yada, yada.  Of course it didn't help matters that to do this part, I cannibalized the rock bed at the other end of the yard.  It's in my plan, but apparently the husband is incapable of reading a plan.  And thus he promptly fuh-reaked out when he came out after I was done hauling rock back and forth.

My yard - my own personal "Hideous Bed."

   
From the front

From the side - the drainage ditch makes a V shape so it waters the plants I have planted in the rocks (Brazos Penstemon, Blue Penstemon, and Hummingbird plant).

Friday, February 22, 2013

Garden Design Implementation: Phases 7 and 8 of eleventy-billion


Phase 7:  I don't know if it was the impending dinner party, the brush pick up, or the fact that he squashed my dreams of a cinder block wall, but while I was at Pam's Lawn Gone talk at the Natural Gardener, the husband set up my secondary rain barrel.  This rain barrel has been sitting in the yard not set up and not collecting water since my friends gave it to me when they moved in April.  As you can see, he used the cinder blocks as a stand since more head equals better draining of water from the barrel.


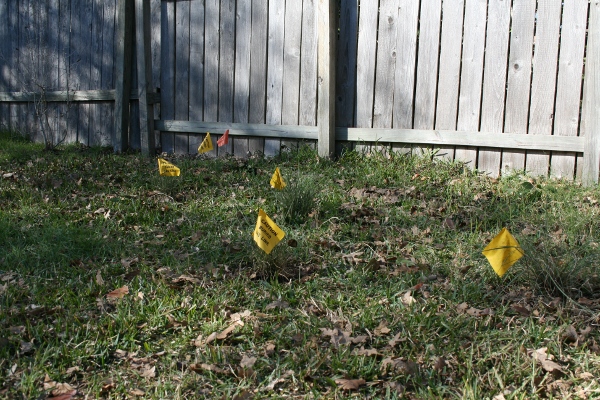
Phase 8:  The planting of the grasses.  My original Plan called for two Big Muhly grasses, and when the husband nixed the cinder block wall, I added a third.  Since I decided that wouldn't give enough screening, I decided to add three Gulf Coast Muhlies to the mix as well.  Of course I don't think this will be tall enough to totally shield the utility box, but it's a start.  Of course you can't see green on green grasses, so I'll help you out - the yellow flags are the grasses and the one lone orange flag in the back is a coral honeysuckle vine.  The flags, naturally, are meant to keep the husband from accidentally mowing over them.  I purchased one of the big muhly grasses back during the fall Wildflower Center sale, I got one from my coworker, and I purchased the third at Barton Springs Nursery the day of the talk (yes, I totally visited two of our awesome locally owned nurseries on Saturday).  I got the two gulf muhlies at the Natural Gardener. The coral honeysuckle also came from BSN.  Not shown:  The Augusta Duelberg sage and 2 Ruby Crystals  grasses I also got at BSN.

All that's left on this side of the yard is to plant the Hamelia Patens aka Firebush next to the rain barrel (I use the scientific name because the plant is sometimes called hummingbird bush, but there are a bunch of other plants also called hummingbird bush).  I may also replant more petunia as my current plan calls for having it moved all to this side of the yard (but I may wait until the fall to move the rest).

Sunday, February 10, 2013

Garden Design Implementation: Phases 3 - 6 of Eleventy - Billion

NOTE:  I call it "Eleventy - Billion" because it makes Roberta happy.  She's not a numbers person, so I'm not sure how she's so sure that such a made up number is, in fact, accurate.

Welcome back to my backyard - where I have a plan, but the husband decides the plan is lacking.

In case you don't follow me on the facebooks, a few weekends ago I went out and purchased 6 cinder blocks.  I figured 6 was a good number to start with.  You'll remember that my plans called for a cinder block succulent wall.  My husband, however, did not remember this little detail.  My husband does not like cinder block walls (even after I showed him Pam's pictures of her wall).  He also does not like galvanized steel stock tank planters/ponds.  I have since decided that he is a weirdo.  This also means that I have to change my plans for what to do in my little rock patio area (not to mention figure out what type of planters to get for my herb garden thing I want to do). Also, this leaves a hole in my plans of what to do about screening the utility box.  He's all for building something out of wood, which I'd rather not do...so I may end up just planting some tall grasses, throw in a bottle tree, and call it good. (watch, he probably doesn't like bottle trees either [edited: He does not like bottle trees...found that out this afternoon.  Lesson: I like modern, he likes manor style classic - so be glad I have any plants.])

Anyhow, back to the story at hand - I came traipsing home with 6 cinder blocks, 4 of which I immediately lined up in the rough location of said wall.  The husband was not amused.  In the end, I used 2 cinder blocks to create a step down from the deck; the other 4 are in their original location, but are now covered with pruned tree limbs so we can't see them.  And if my husband can't see something, it doesn't exist.  The problem with the step I made is that it's still a bit of a big step to get from the deck to the step and vice versa, so I may have to put two of the remaining cinder blocks on their ends to make a two-step system.  The other two will be used to elevate one of our rain barrels. (Again, my plan was to raise both of the rain barrels, but that, apparently, is too much work and so we will only raise one of them.  Maybe.  I think the husband is talking himself out of it because it requires cutting a down-spout and breaking rivets or some such)
It ain't pretty, but it's functional.  And for now, that's all I need.

Phase 4 was planting Dianella along the side of the deck - if the plants don't make it (due to lack of water or otherwise), I'll just have to find different plants to plant.
A zoomed out photo

Close(r) up of the dianella plants at the deck.


Phase 5 was moving all of the Mexican Petunia from the shady side of the yard to the more sunny side of the yard.  That went well.  I haven't moved two clumps yet (the ones by the humming bird feeder), mostly because I couldn't remember off the top of my head if they were supposed to move or not.  Hopefully the Petunia will like the northeast corner of the yard better than they like the south fence line. I think they should, overall, get more sunlight there, which will make them happier.
A bad picture of the transplanted petunia - you can't see anything.  That's why it's bad.  I guess if you get your magnifying glass, you can make out a few sticks sticking out of the ground, those would be the transplanted petunia.

Phase 6 was installing a 'step' to help climb the little hill thingy we have going on in our yard.  Of course ,this 'hill' was recommended to be removed by the garden bloggers at the Go-Go 2 Julys ago, but, as Bob says, 'anyone can have a normal looking tree' and I like having the grade change, so I'm going to try to keep it.  I was trying to figure out how this whole "add a step" thing was going to work out because I figured any time I tried to dig into the dirt, it would erode away with rainstorms.  And it may very well do that, but I figured since I had the red stepping stones from Phase 1, I might as well use them.  So instead of 1 step, I now have 3 and a half.  I say half because I only really need 3, but I didn't know what else to do with the 4th step, so it's kinda just laying in the dirt above the steps completing the little stair case.
Steps.  The plan is to plant a crapload of castiron plant along the fence.  Maybe I out to plant something with some height...I do have a Carolina Buckthorn tree that I have to find a place for...

You know what's gotten bad?  The laying in bed at night contemplating what to do.  Even though I have a plan, the husband has already up and changed one aspect of it, and so I've been contemplating what to do that will work for everyone (including the electric and cable workers that will need to get back to the box with some regularity).  Also, the area where I was going to put the little stock pond.  I think I've decided to switch it to a bird bath, but I'm not sure on if I want to keep the whole "flagstone patio" type look.  because that will still be a ton of rock in the back yard...maybe if I switch up the color it wouldn't be as noticeable...or maybe it'd be MORE noticeable.  I think having a dark loose rock (like pea gravel or river rock size) patio would look great with some cement squares laid out to walk on.  I'm pretty sure this goes under 'modern' and therefore the husband will nix it, but he'd be fine with the flagstone style set up.  Normally, I'd just do something and be like "don't worry about it, it'll be fine!"  The problem is that if my husband doesn't like it, I would never hear the end of it and every project I do after that will be a constant question of "Yeah, but remember how that patio turned out?  hideous."  It would be like my own personal "hideous bed." 

Tuesday, January 1, 2013

Resolution: Focus

Taking a page out of The Whimsical Gardener's book, I'm going to have a one word goal for the year.  That word is "focus."  It applies to all aspects of my life - work, personal, garden, photography, and so on and so forth.

So yes.  Focus.  Focus on the now. Focus on the future. Focus on the plan. Focus on the animals.  Focus.

Sunday, September 30, 2012

Plans

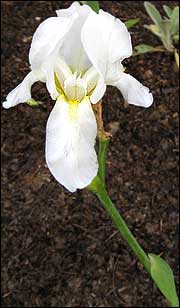
And of course I've already gone about making more changes.  Mostly because 1) when I was at the Sun City Plant Sale, I said to myself, "Self, you need some irises because they're in your plans." and so I bought myself 3 irises - a William A Setchell, a Jesse's Song, and a White Cemetery (I also found out that the husband does not like yellow irises).  Unfortunately, I only had space for one plant - and I know I intentionally planned it that way because I have a mystery iris that I've been moving around my yard looking for a good spot for it to call home.  and 2) Shawn started questioning the design of the patio area (bulbous thing on the upper left) - not so much that I wanted to turn it into a patio with bird bath, but more because 'what are we going to do with the rock that's already there?'  ummm...get rid of it.  duh.  Leave it to my husband to not care about the cost of re-landscaping, but to instead care about the fact that we would be getting rid of stuff.  So I've added more space for iris and have reduced the size of the patio, though now I need to come up with more plants to plant in the area that is going to be neither rock nor patio.

Wednesday, September 26, 2012

Project Update: Rose Bed


An updated photo of the 'rose bed' is in order.  The rose bush is a Dr. Huey rose, and I planted two zexmenia, a thyme plant and lion's tail in the bed as well.  This is likely the last of my "plopper" projects (admittedly, I had, to some extent, at least planned on putting the zexmenia here when I was at the Wildflower Center's plant sale going "I really, really want these...where am I going to put them?" But the lion's tail and the thyme were surprise purchases while at the spring Sun City plant sale and East Side Succulents, respectively).

And, of course, after looking at this photo (even though there is no mulch in the rose bed, it does have the color of mulch), I'm not digging the decomposed granite vs. mulch look...which means I'm either going to be raking up all the DG or adding it to the rose bed...maybe I can make it look 'artsy' in what parts are DG and what parts are mulch in the bed...

The beginning of the rose bed project can be seen here:
Project:  Rose Bed

Sunday, September 23, 2012

The Best Laid Plans of Mice and Men...

There are mighty plans afoot.  Mostly with entirely redoing the side yard/back yard.  It is a project that I've had in mind for over a year now, but I've just never done anything about it.  UNTIL NOW.  As per my goals I wrote up for the year, I have finally come up with a plan.  I know, this is as weird for me as it is for you.

As the back portion looks now - a 'dry creek' which doesn't provide anything other than a crapload of rock.  In the new plan:  GONE.  Replaced with a small rock patio area with bird bath.  Also gone: the invasive nandina in the back corner and the asian jasmine.
As the front-ish portion of the area looks - totally over grown.  In the plan:  rock edging is gone, the turk's cap and shrimp plant stay in the same locaitons but the violet and petunias move.  Also gone - the struggling grass.  I don't really have what will be used for the paths defined yet...maybe foot friendly groundcover, maybe mulch, maybe decomposed granite.

Man, this planning instead of plopping is hard stuff...

And don't worry - as soon as I get my plan scanned in, I'll share it (scanned, taken a photo of, whatever - I'm an engineer, not a graphic designer).

Thursday, September 20, 2012

Plopper vs. Planner

The area between the walk up to the house and the house itself is a no-man's land of 'plopping' goodness.  Society garlic I got from Diana and dwarf ruellia I got from Amy are the primary plants - two of each (not three, because 3 would have made sense, but why do something that makes sense when you can make it do something wonky?).  It also has a rosemary plant and a zexmenia plant (both from Bob).  The pots I added because there was no where else to put them (and I have a weakness for pots).  The pots are filled with succulents. 

You see, in gardening, you're either a planner or a plopper.  Ploppers can become planners, but rarely does a planner become a plopper.  A planner PLANS the garden - what plants, where they'll go...some even get really good at it and are able to get plants together that will compliment each other (whether in bloom color or foliage contrast), and add plants that provide 'seasonal interest.'  In my completely non-designer speak, I take 'seasonal interest' to mean 'doesn't look like a bare twig in January, or if it is a bare twig, it is going to be the best bare twig you ever did see.'

My beloved culinary ginger plant (zingiber officinale) and the beloved sugar cat completely ignoring me and waiting for the magical door fairies to come open the door for him.

A plopper, by contrast, PLOPS in the garden.  A plopper gets a plant, figures out what it needs to grow and then plops it in the ground in a fitting location with little regard to what is planted around it, when it will bloom, and how it looks in that location.  I am a plopper.  I can't pass up a good deal (including free plants gifted to me by other garden bloggers - they're totally thinking "I know, I'll give it to that sucker, Katina!").  Hell, I can't even bear to throw out plants that I don't need nor want - I'll dig them up and give them away to others "HAHA! I'll totally foist these off on those suckers known as fellow garden bloggers and/or coworkers!"   The point is most ploppers' yards are a mishmash of mixed plants and, during certain parts of the year, look devoid of all life.

My avocado tree.  I started this thing from a pit in May 2005.  See, I can't even throw out things that are POTENTIAL plants.

As I said, it's very possible for ploppers to become planners, but difficult to go vice versa.  Since I'm a plopper and I'm trying to be a planner, I have gotten started on coming up with a comprehensive plan for the back yard - hey man, I gotta start small...of course, it would probably make more sense to do the front yard since that is the one that people see...but we're going to start with baby steps...