Showing posts with label nerd stuff. Show all posts

Sunday, June 6, 2021

'Shroomin

I'm not a fan of mushrooms. I won't eat them raw, and I'm only okay with them chopped up into small pieces that I can't easily pick out of my food and it's gotta be in something that I can forget they're in (like stir-fry or pasta sauce).  

So you'll find it pretty interesting that I bought myself a mushroom growing kit for Christmas.  ::shrugs:: I sometimes do the Bart Simpson method of gardening - Bart: "More Lima Beans please.  More.  More."

Lisa: "maybe you should eat the Lima beans already on your plate."

Bart:  "Who said anything about eating them? I just wanted to look at them."

I also bought kits for Roberta, my friend Jameson, and my mother for Christmas  (i.e. I got one of each variety that NorthSpore had available in their Spray n Grow kits).  Roberta had one big harvest, and then misting the growing block for a second harvest fell by the wayside when the big freeze hit (since she was without power for DAYS).  My mom had one harvest and then was like "this block looks icky, I don't think I want to grow any more" though she did gamely cut out a different side and try to get that side to grow, and instead ended up with another small harvest from the side she thought looked bad.  Jameson took a while getting his started because he was worried about the mushrooms sporing and spreading all over his apartment, and when he finally did start growing them and they were looking like they were about to harvest, the big freeze hit and he got more concerned about other things (like making sure his parents still had electricity and water), and by the time he got back to worrying about the mushrooms they were past their prime - he also didn't know at what point he was supposed to pick them, or what he was supposed to do with them (he got the Lion's Mane because I figured if anyone was going to be willing to experiment with a mushroom that's the vegan replacement for fish, it'd be him, but alas, nothing came of it).  

My box produced 2 harvests that were pretty dang big (while my mom had to mix in some store bought mushrooms for her harvests, but Roberta and I did not); and the craziest thing about these boxes is just how much it's like "dang, did you see the mushrooms now?!" because they grow very quickly once they actually sprout. I even tried to do a timelapse, but I think I tried to do it when the shrooms were already too big and I should have started when they were little pin-mushrooms instead.  So instead you get to see photos taken of the mushrooms like 24 hours apart.

Day 1 of noticing little shrooms (probably like 3-4 weeks after I started misting it)

Day 2

Day 3

Day 4 - We harvested a day or so after this I think because Shawn misunderstood what the directions meant by "harvest before the mushrooms have flattened out"

What we learned from our first harvest:  Yes, the oyster 'shrooms really do taste bad when raw.  Oyster mushrooms have a very metallic taste to them when raw so they're always cooked - and they tend to be cooked for quite a while (like 20-30 minutes).  We also learned that the stems need to be cooked for much longer than the caps if you're using them.  After the second harvest, we realized that there is a sweet spot for size of these things because too young and they're tougher and chewy, but if you let them go a little longer they're much better, but if you let them go too long, they get too waterlogged (though that might be more because for harvests 3 and on, the mushrooms have been outside and are subject to the elements).

After the second harvest, NorthSpore recommends breaking the brick apart and mixing in the medium with either straw or mulch and keeping it moist in a shady spot in your yard to get even more harvests.  so that's what I did with my mom's block and our block.

Harvest 1 of the outdoor Golden Oyster Mushrooms (they are now, as of 6/6/2021, producing more mushrooms again).

Harvest 1 of the outdoor Blue Oyster Mushrooms

Harvest 2 of the outdoor Blue Oyster Mushrooms - these are the ones that are old and waterlogged (and this is about a month after the one above)

I do, truly, believe that the only reason these mushrooms are producing as much as they are outside is solely because we've been getting SO MUCH small amounts of rain in Austin this spring - like to the point where I'm thinking of making another weather chart for the year - the average amount of rainfall by June 1 is 13.56" and we're currently at 19.66" (6.5" of that falling in Memorial Day Weekend, but otherwise, there's a lot of 0.1" here, 0.02" there).  Because, let's face it, f these things needed ME to water them to keep producing, they'd get blasted with water maybe 2x a week if they're lucky.


Sunday, January 6, 2019

Camera Things (Part 1)

Man...It's be like forever - almost 2 years, really - since I've done a blog entry.  There's been a Sunshine Community Garden plant sale and everything (spoiler alert: I bought too many tomatoes and they only produced a handful).

Anyway, today's blog entry is brought to you by Roberta's Camera, El Presidente.

El Presidente got sick about a month ago so he was sent off for treatment.  Now he's back, but there's a new stud in town (Pincay) so he's been relegated to second fiddle.  Because I always talk about how I need a better camera than my trusty ol' Rebel XTi, Roberta offered to loan me El Presidente with one of her lenses so I could play around and determine if I really wanted a new camera. 

I haven't done a "camera" test yet, but I did do a "lens" test the other night.  I used El Presidente with different lenses to see what type of difference a lens makes.  The lens I borrowed is a 70-300 IS lens.  The IS stands for "Image stabilization." That means that it tries to account for you moving ever so slightly while taking a photo so that you get a clear photo instead of a blurry one.  I have a 70-300 lens, and Shawn has a 70-300 lens so I put them all to the test.

All three lenses have autofocus on them, though Shawn's is a pain in the ass and you really have to use manual to get it close, then switch it to auto so it actually will focus.  In any case, while I took a bunch of photos, the ones on the tripod looked about the same, and the ones where IS was turned off on Roberta's also looked about the same, so instead I'm only showing the three photos that demonstrate why you either a) want to use a tripod when taking photos at full extension (i.e. at 300 or b) why you want an IS lens.

As mentioned above, because Shawn's lens doesn't really autofocus, I decided I'd use Manual focus for these photos.  Aperature (how much light is let in) was set to 5.6 for all the photos (meaning that the background should be kinda fuzzy).  The shutter speed was set to automatic, but ended up being at 1/20 of a second for all three photos.  Usually, to cut down on motion blur (i.e. the camera moved), you want your speed to be 1/your distance - that is, I had these all set to 300, therefore I should have set my shutter speed to be 1/300 to cut down on motion blur.  Unfortunately, because it was dusk, I didn't really have the luxury of setting my shutter speed faster (unless I changed the ISO - i.e. film "speed" - it's why they always used to tell you "use 400 speed film when photographing sports, 100 if you're doing portraits")

The lens line up:  My lens (on camera), Roberta's lens, Shawn's lens


First up: My lens at full extension (300) attempting to take a photo of our formerly feral cat, Stripsie.  As you can see - terribly out of focus.  This is worse than normal - Shawn's lens is closer to what I expect, but you also will end up with a LOT of photos looking like this.  In this case, I probably didn't properly brace myself (bend the knees, engage your core, breathe in, breathe out, and as you breathe out, press the trigger - it's like shooting a gun, really)
300mm, 5.6, 1/20, ISO 320, lens= Canon 70-300 EF 4-5.6 III ($200)

As you can see, it looks a little washed out, but that's something that's easy enough to fix in GIMP (free photoshop)

a little better but still really bad.  The one thing to remember about photo editing - you can fix a lot of errors, but it's damn near impossible to fix 'blurry' so you really want to start with a crisp photo.


Shawn's lens
300mm, 5.6, 1/20, ISO 320, lens = Sigma 70-3004-5.6 APO Macro Super ($200)
Much clearer, but still a little on the fuzzy side.  That fuzz is from motion blur - I probably stabilized myself well, but you still have to depress that shutter button which moves the camera a little.  This is the type of stuff that can be fixed by using a tripod or monopod.

And with the level fixing: (btw, this is what happens when you click that little sun at the top of the screen on Instagram if you go into "edit" mode - and aren't using one of their pre-set filters - I believe they call it "lux")


Finally, we have the Image Stabilization lens.
300mm, 5.6, 1/20, ISO 320, lens = Canon EF 70-300 4-5.6 IS USM ($650)

As you can see immediately, the image is much clearer.  It's not actually 100% clear - there's still a little motion blur, but it's so much less than the other photos that it appears clear.  I also technically had this set to the wrong type of motion correction - I had it set to II, when I maybe should have had it set to I as II is to be used for when you're panning, vs when you're not panning to the side.

And with levels fixing:

So yeah if you plan to be using a telephoto lens, it really does make sense to pay the extra cash for an image stabilization lens unless you're going to use a tripod/monopod for everything.  As I said, the photo above is STILL blurry from motion blur, and the only way to fix that would have been to have either a faster shutter speed or use a tripod.

Next up: the different camera bodies: 
- Canon D30 (Shawn's. It may not even work any more - it's been probably about 10 years since it's been used if not longer)
- Canon Rebel XTi (Katina's)
- Canon 6D (El Presidente)
** Also, sometime in the last 20 years, Canon changed their lens mount so I may not be able to do my camera test like I want to anyway.

Thursday, January 12, 2017

Spring Seed Starting

I usually start my spring seeds around the 1st of the year: new year = start yo' seeds, especially the tomatoes, peppers, and eggplants.  This is my second year using my seed starter set up - a shop light, 2 little Jiffy starter trays, and my textbooks (finally putting that Organic Chemistry book to good use). I also went through ALL my seeds, and boy were there a lot of them, selecting the oldest for use first. 

I'm a weirdo and will usually try to start my seeds in conjunction with a recommended day based on the Farmer's Almanacs.  Bob once told me the general rule of thumb for seed starting, but I don't remember what it is (it's probably something like between the first quarter moon and the full moon is the time to plant above-ground crops, and below ground from the full moon to the 3rd quarter moon and any seeds that need light to sprout should be planted on the full moon).

Seeds started:
Black Krim Tomato (from 2011)
Italian Roma Tomato (from 2011)
Long Red Cayenne Pepper (from 2009)
Red Demon Thai Pepper (from 2011)
Cossack Pineapple Ground Cherry (from 2012)
Custom Blend Basil (from 2010)
Pasilla Bajio Pepper (from 2016)
"Green Leaves" Renee's Black Jalapeno (from 2012)
California Poppy (from 2012 or so)
Elaine's Fennel (from 2010 or so)

As you can tell, I did start ONE seed that is new to me - the Pasilla Bajio Pepper which I found on clearance right before Christmas. 

It's been 10 days, and so far the tomatoes, basil, and Cali poppies have sprouted; the ground cherry, cayenne, red demon, and fennel are just starting to sprout.  The jalapeno and pasilla are doing absolutely nothing.


Friday, November 13, 2015

Mt. Lemmon, AZ

One of my grandparents' favorite places to take out-of-towners is Mt. Lemmon. This is because Mt. Lemmon has enough of an elevation change that there is actually a small ski resort at the top of the mountain, and the temperature is routinely 30-40 degrees cooler than it is in Tucson proper.

I didn't get any photos of it, but the at the lower altitudes of Mt. Lemmon, there is a real problem with Fountain Grass.  I wanted to get some photos because it sure is pretty (even if it is invasive), but there never seemed to be any along the pull out areas - it was always along the areas where we couldn't stop because of safety concerns. Which I guess makes sense - there are probably people who come and pull up the plants in the areas where it's easiest for them to get to.  In any case, there were parts that looked very much like the Wikipedia photo about fountain grass...

The view of Tucson from the first scenic overlook on Mt. Lemmon.  Tucson doesn't have skyscrapers, so it looks very flat.  The entire south side of Mt. Lemmon is a saguaro forest - it was very similar to Davis Mountains only with Saguaro instead of Yucca.

The little infographic showing the various altitudes and associated plant types.  It was 50 degrees at the top - it was 90 in Tucson that day.

Balanced rock at one of the scenic pullouts.

Wanda on the left, Vern in the center and Shawn on the right.  Shawn actually has a photo of me taking a photo of him, and it's actually a really cool photo because the wind is blowing and the sky is all black with just a smidge of blue...I should try to find that photo...

Looking up at the trees across from the ski resort.

Ski run.
Grandpa and me walking at the top of Mt. Lemmon.  The top of the chair lift is that building in front of us.

At the tippy-top of Mt. Lemmon.  I love my trees with character...maybe this would be my tattoo tree with a bird added to one of the branches...

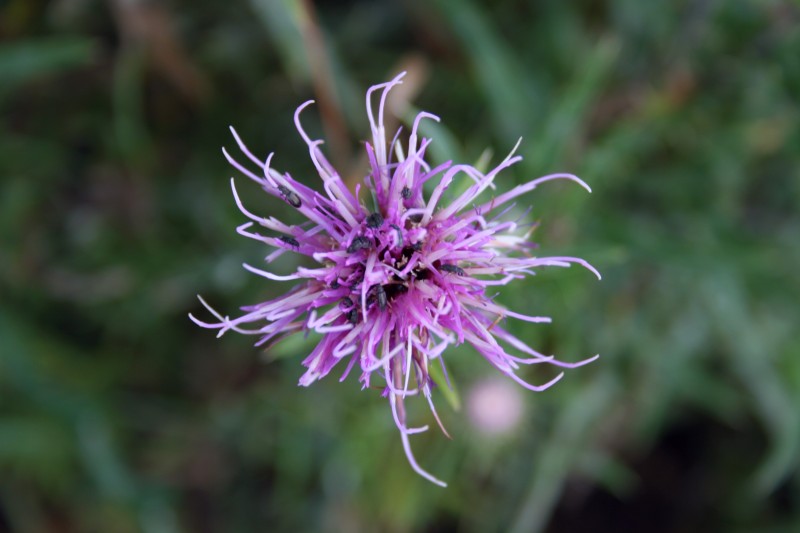
Thistle

Agua Caliente park in the shadow of Mt. Lemmon.  We went here solely because they wanted to show us all the palm trees.  As you might imagine, Palm Trees are not native in Arizona so every time you see them, you know that someone planted them.  This park reminded me a lot of Bonnet House in Fort Lauderdale.

Prickly Pear growing IN the palm tree.  Damn birds, always getting those seeds places where they're not supposed to be.

Doing a short walk to the pond and back.  This was just after Grandpa was telling me about Osage Orange plants and how they had them growing along the fenceline back when he was a kid.

Agua Caliente Park pond

Saguaro at the first pull out on Mt. Lemmon.  It takes about 75 years until saguaros start to branch, and most don't live past about 200 years.

I went through all of the photo albums my grandma had at the house and I thought it was hilarious that she had a picture of the agave that I had taken a picture of (only taken about 20 years ago).  The saguaro is now looking a bit worse for the wear, and the one that was behind it obviously isn't there any more...

Saturday, November 7, 2015

Titan Missile Museum, Sahuarita, AZ

After leaving Cochise Stronghold Campground, we drove an hour and a half to my grandparents' place in Sahuarita. Sahuarita is the home of the Titan Missile Museum.  It's also like a 5 minute drive from their home so my grandpa took us there since my grandma was working on things at the church.

But first, a picture of my grandpa's tomato plant.  That's right, singular.  The monster takes up most of their patio.  It also has only produced a handful of tomatoes (which were not very good, we were told).

Giant tomato plant

It's started growing into the pond to get extra water.

A picture of some old carbide miner's lamps - I'm guessing these were owned by my great grandpa and great uncle who both worked in the mines.

The Titan Missile Museum has guided tours on every 2 hours or so.  After giving a brief history of the Cold War, they take you down into the bunker and show off the control room.  On the far right of the photo, you can see 2 full panels which are empty except for 2 slots - the 2 slots replaced the panels when computers started to become bigger and better (i.e. smaller), some of the other missile locations went down to one slot a few years later.  Now if they replaced all the computer components, the entire system you see here would be replaced with your cell phone.  That's right, if you ever start feeling like you're smart, just remember that they managed to land a man on the moon using computers less powerful than your cell phone.

Women were allowed to work in the Missile Silos beginning in 1969 and the last commander of this location was actually a woman.

Everyone over 5'10" has to wear a hard hat.  The entire bunker is on giant springs to protect everything when a) the missile is launched, and b) when the missile from the Russians hits.  You can see one of these springs behind my grandpa - the dapper man in the black polo shirt.

The file cabinet o' doom.  This is where the missile codes were kept.  The entire set up was meant to be a retaliation launch, not an offensive launch.  This basically means that the military men and women in the bunker knew that after they launched the missile it was just a matter of time until they would die because if they left the bunker, it would be a nuclear holocaust outside, but the bunker only had a limited supply of oxygen.

Drawbridge to the missile controls.  Gotta go old school to let people know not to touch buttons.

A view of the drawbridge - apparently some scene from Star Trek was filmed here.


Looking at the cone


Call box with Coffee Can.  This was the 3rd phone the person reporting for duty had to call the commander on and read off the day's pass code, where he would then burn it and throw it in the coffee can - the door wasn't opened until the commander saw ashes coming out of the bottom of the can.

Grandpa standing in front of the Tipsees - basically the burglar alarm at the site - anything that passed in front of the tipsees set up opposite each other broke a radar signal and set off alarms in the bunker.  The missile door also had a weight alarm on it so you couldn't just go walking about the site or take a smoke break on the missile door.

Looking down at the cone - the missing rectangular part is a visual show for the satellites that the missile has been neutered.  The doors are also stuck in a half open position for the same reason.

The engineers checking out the engines.

Standing outside the site looking in.  The missile doors are on the left behind the jeep (the thing that looks like a white, squat volcano)

Cactus bloom.  There were so many cacti in bloom it was crazy.  Of course, we had happened to be there right at the end of monsoon season.

Friday, September 4, 2015

San Antonio Japanese Garden

The view of the sunken gardens from the top of the entry stairs
In late May, I went with my mom and her Sun City garden club cohorts down to San Antonio to visit the Japanese Garden which is right next to the San Antonio Zoo.  I've been to the zoo a few times, but never to the garden because any time I thought about going to it, it was always AFTER the zoo visit and I didn't know how much it was to get in, and I never wanted to walk to the top of the stairs to find out.  (pro tip: It's FREE.)

Tour cohorts with entry sign in the background.  It says Chinese Tea Garden despite being a Japanese Tea Garden.  See history below.

The Sun City Garden Club is the garden club that goes around and does tours - they're like the landscaping club; while the group that runs the community gardens and knows the most about vegetables is the horticulture club.  I guess the theory is that someone started the garden club first so the veggie gardeners had to come up with a different name for their club.  In any case, they will plan a few outings during the year to visit well known nurseries and/or other gardens.  These outings usually include a charter bus, which means that they need to have a minimum of like 50 people sign up for each event they do (their next trip is to the Natural Gardener).

History Lesson.

After driving through a nasty rain storm to get to the gardens (in which my mom fretted the whole time because neither of us brought an umbrella), we arrived and split into two groups to get our 30 minute history lesson before being sent off to explore on our own.


Brick kiln.  Not shown, Artists' village just to the right of this monolith.

Showing the rock wall

Mi Madre getting ready to take a photo with her phone - I only have one other photo I specifically took of her, but she's got a look on her face like "why are you taking a picture of me, you wierdo?" so I opted to go with this one for posterity instead.

Grass seed head


The gardens were conceived by Mr. Lambert in 1917 (as a lily pond) to hide the fact that the area used to be a quarry.  The pond and gardens were constructed for a total cost of $7000 over the next couple of years and opened to the public in 1919.  In 1920, an "Artists' Village" was built at the bottom of the hill (by the kilns) with the plan of the artists selling their wares to the visitors.  During this time, Dionicio Rodriguez created the traditional Torii entryway gate which looks like wood, but is actually made of cement.

Close up of entry gate - made of cement, not wood.

In 1926, Mr. Jingu was asked to take over maintenance of the garden and opened the tea house at the top of the staircase.  Mr. Jingu died in the late '30's but his family continued to run the garden/tea house until they were evicted because of anti-Japanese sentiment in 1942.  The story goes that his youngest daughter was a wild little thing and would run around all over the gardens and was fed food by visitors - to the point where her mother made her wear a sign around her neck which said "please do not feed me."  The Jingu family did not have to go to an internment camp as the local community had adopted the family as their own, but they were placed, essentially, under house arrest and were not allowed to run the tea garden any longer.  The tea garden was handed over to a Chinese-American family (who ran the garden until the 1960's) and was renamed the Chinese Sunken Garden, which is what the entry sign still says to this day, although it was rededicated as the Japanese Garden in 1984 with members of the Jingu family and Japanese goverment officials in attendance.

A view from the top (taken after lunch when it was much sunnier)


Tour goers

Bridge over the water.

bloom

A different angle of the bridge

Waterfall

Pathway through the garden

Another angle of the bridge

A good use of Giant River Cane on the left - but please do not plant this, it's invasive as all get out - albeit easier to control on a large scale than running bamboo (or so I'm told)

A view back at the entry

After exploring for about an hour or so, we sat down to eat our lunch, and snack on cookies made with Japanese green tea.

Me and my Mom, Mary Jo, taken with my cell phone.  Yes my mom is really like 6" taller than me, so is my Dad.  I'm just a weird squidgit.


After lunch we piled back on the tour bus and made our way to Rainbow Gardens where we spent another hour and a half or so.  We were supposed to be given a guided tour, but the tour guide was sick that day so we were left to our own devices. I managed to not purchase any plants, but my mom insisted on buying something for me, so I got 2 small tchotchkes for my succulent planters.
One of my Tchotchkes - a ceramic rabbit (it's about 3" long), the other is a small ceramic bluebird.